Showing posts with label Inspiration. Show all posts

Monday, July 25, 2011

Feathering Our Nest With Love: Part 2 & a Crafty Quick Fix!

We've surged full steam ahead on making over our bedroom! Despite the heat and the handicap of living in small apartment with very limited workspace, we've made quite a bit of progress! Jay is thrilled because he's gotten to use some new power tools we received as wedding gifts and I'm super excited to get a paintbrush back in my hands!

Here's a quick preview of some of our progress:

Removed all the hardware from Jay's tall dresser. Helpful tip: Use duct tape to label the lids of re-used plastic yogurt containers. Store any loose hardware you may need again in these containers. Write the name of the project on the duct (and if you're anything like me, the date too! You might have more than one project going at once!)


Primed all the drawers and the dresser itself with Zinsser. The primer I chose purportedly adheres to painted and finished metal, wood, masonry, etc. without the need for sanding. This snapshot is the top of the dresser after one coat.
After two coats of primer (with thorough drying time), I got to add my first coat of real paint! Our color of choice: Aqua Bay by Pittsburgh Paints. We have an exciting finish to add over top of the Aqua Bay paint, but we're anxiously awaiting it's arrival from the postman! Stay tuned!!!

And as promised, a crafty quick fix perfect for any living space!

Crafty Quick Fix: DIY Privacy Fabric Window Clings

Achieve a comforting sense of privacy while letting in the natural light! This project is perfect for apartment dwellers or anyone looking for an inexpensive and removable solution.

Supplies:
White Cotton Fabric, Scissors, Ruler or Tape Measure, Iron, Plastic storage bin, Spray Starch

Step 1: Assemble supplies (Image A)

Step 2: Measure the width of your selected window. (Image B) Choose how much of the actual window you want to cover. Since our window contains two panes of 27”, we decided to cover the bottom 27 square inches of each pane. This allows unfiltered light through the top portion of the window, while still providing plenty of privacy from the lower portion. (We have blinds we can lower if we ever want to reduce the level of light in the room!)

Step 3: Clean your window with glass cleaner. We like Seventh Generation Free & Clear Glass and Surface Cleaner!

Step 4: Cut your white cotton fabric to the appropriate size to fit your window. Since I need two 27” squares for my window, I’ve resorted to the old origami trick of folding a right triangle to achieve my square! (Image C) Iron out any wrinkles. You want your fabric as wrinkle-free as possible.

Step 5: Using your plastic storage bin to protect your work surfaces, gently begin dousing your fabric with spray starch. (Image D) Use your spray starch as directed, giving the fabric a good soaking.

Step 6: Once your fabric is thoroughly moist with starch, hang on your clean window pane. Beginning at the top, gently smooth out any wrinkles. Continue to spray your fabric with starch to encourage adhesion. Once all of the initial wrinkles have been smoothed out, apply a thorough coat of starch to the entire fabric. (Image E)

Step 7: Repeat steps 4 through 6 for any additional panes you wish to cover. Rinse your hands, wash out your plastic bin, and revel in your privacy! Image F is a snapshot of our window from the outside at night. The left window pane is completed and the right pane jealously awaits it’s turn!

Tomorrow I'll have updates on the progress to our DIY headboard and Jay's quality time with his new toys!

Sunday, July 24, 2011

Feathering Our Nest With Love: Part One

Now that my devoted husband and I are settling into married life (2 months & counting!), we thought we'd say ta-ta to our bachelor decor ways. Gone are the days of mismatched furniture, disorganized disarray, feuding color palettes, and living out of the clean clothes baskets. Since our lovely Governor is doing his utmost to foil our plans of moving Northwards, we've decided to plow forward and do whatever we can to make our current (yet temporary) living space truly feel like home to us.

First and foremost for any newly-wedded couple: the bedroom. In a one-bedroom apartment, this space needs to be versatile and well-organized but also serene and tranquil.
We have approximately 13' x 13' to work with. This includes a closet with floor to ceiling sliding doors running along the entire eastern wall. We have an awkward 4' window in the middle of the northern wall, directly above our apartment's sole air conditioning unit. Like most apartments, our walls are painted a hazy off-white. Most of the trim and woodwork, including the monstrous closet doors, are a dark espresso veneer. Visually, here is what we have to work with:

To update our pathetic and paltry bedroom, Jay and I have started scouring the internet, sorting through our fine collection of DIY books, and keeping our eyes open for inspiration. We'd like to re-use and re-purpose whatever we can and supplement what we do have with goodies from Habitat ReStore and thrift stores whenever possible. Visually, here are our initial ideas:


T
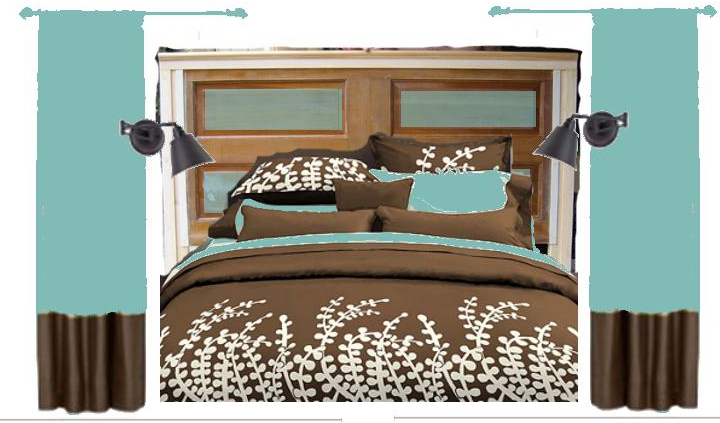
hanks to potterybarn.com and Gimp, we've been able to cobble together an inspiration board of sorts. Pottery Barn has an awesome online tool to help you visually map out your room design. We've created the above layout, switching our queen bed from the western wall to the sourthern wall, and adding in some luxury with a unique floor rug. In Gimp, we were able to play around with color and shape to design a working idea. Here's a list of some of the projects/items/ideas we'd like to pursue:
  • Create a headboard out of re-purposed vintage door
  • Find His & Her gooseneck or adjustable wall-mounted reading lamps for bedside
  • Re-configure closets for more efficient use of storage space
  • Re-finish the old dressers Jay has had since he was a kid
  • Enhance the window to allow for natural light yet still provide privacy
  • Disguise the Goliath-size closet doors
  • Provide me with an intimate and inviting workspace
  • Create a serene, tranquil, and stress-free sleeping environment that uses a canopy of sorts to block out the rest of the room for when we just want to "get away from it all"
My plan is to keep y'all posted with daily updates on our progress. Some of these projects are simple Crafty-Quick-Fixes, while other projects may require several days to reach completion. This adventure Jay and I are about to embark upon will be great practice for when we move to a more permanent and North-Eastern-ly location. Blogging about our triumphs and especially our tribulations will help regulate my perfectionism too!

I'm itchin' to get started! Stayed tuned for many updates to come!

Tuesday, October 13, 2009

Idea Journal = Instant Inspiration

If you're anything like me, you read a magazine or browse a catalog and inevitably find tons of inspiring projects or home decor ideas you'd love to try someday. You tear out or photocopy the items or articles you like the most and squirrel them away in random places around the house. Or even worse, you save the entire catalog or magazine in fear of besmirching it's integrity and the inspiration it contains.

Stop all of that silly nonsense and buy yourself a blank journal. I prefer the orderliness of a lined journal, but get yourself whatever is most functional for you. Gather up all of those random clippings and copies and determine any major themes among them. For me, it's Home Decor Ideas, Holidays, Special Occasions, and Gift Ideas, but for you it could be more specific like Color Ideas and Fabric Samples for the Living Room or Garden Tips or Anniversary Vacation Destinations. Now make tabs for each of your categories by placing same-shaped stickers back-to-back on the edge of a journal page. Space these tabs out throughout your journal and evenly down the side edge of the journal.


Now start pasting in your fabulous articles and pictures, leaving plenty of room to jot down notes. Record your initial reactions or ideas on how to take the project and make it better with your own special touches. And no need to do this all in one day. I continually add to my Idea Journal and use long car rides to do any of the note jotting I need to do.

This is a great way to always have ideas at the ready and to keep control on that inescapable creative clutter!

Wednesday, June 24, 2009

Get Lost!: At the Farmer's Market


Gorgeous sunny days and enthralling summer thunderstorms mean only one thing: ideal weather for perfecting produce. And the best place to purchase the best local produce is at your local farmer's market.
You'd be surprised at the bounty of goods available at most farmer's markets. Sure, fresh fruits and veggies are expected, but anything from fresh baked goods to locally produced honey and honey-made products are usually available for purchase. Even gourmet dog treats and hand milled goats milk soap can be purchased at farmer's markets!
Although its a bit early in the season for most fruit and vegetable delights, check out PickYourOwn.org for harvest times in your area. My boyfriend can't wait for the local sweet bell pepper harvest to ripen. We're already collecting recipes to try out with the freshest local ingredients available. I encourage you to let the fruits and veggies of the season inspire your next menu. Not only is it cheaper to purchase produce when its in season, but you're also supporting the local economy and you're providing your family with a healthier, fresher option.
F
or some simply yummy recipe ideas, several reads are now on the market specifically written with the farmer's market shopper in mind. We've been going green and saving a little money by using some of the titles available at our local library. Better Homes and Gardens has a few older books available, but one book I'd love to get my hands on is "Fresh from the Farmer's Market" by Janet Fletcher. Some of the reviews on Amazon claim her recipes are a little too restrantry and sophisticated, but I'd love to read what shopping tips she provides.

Wednesday, June 17, 2009

Get Lost!: In the City

Great architecture and classic design share a distinctly unique relationship. They can play off of each other, influence each other, and inspire each other much to our aesthetic pleasure. For the cost of a bus fare, metro ride, or parking meter, you too can enjoy the hidden beauty which lies in any urban setting. Grab your camera and capture your favorite shapes, patterns, architectural elements, and design motifs. Challenge yourself to be inspired by them for your next craft project. Or better yet, take some artsy photos, blow them up and have them framed. Give them away as housewarming gifts to new neighbors or present them to old friends that move away so that they may have a lasting memory to cherish and admire.

Check out some of the shots I collected on a recent trek into the urban jungle!

Monday, June 15, 2009

Salvaged Parts: Deconstructed Jewelry

If you're looking for a quirky, low cost way to spice up your cards or add a little bling to your scrapbook pages, hit the thrift store, check out some rummage sales, or rifle through the closet of a family member. Old, unwanted, or broken jewelry can quickly and easily be salvaged for usable charms, chains, and beads. I especially love deconstructing vintage earrings - that way I can make two identical cards using the same design element!
Just look at the treasure trove of inspiring goodies I purchased this weekend from my aunt who sells vintage jewelry. Ideas are already swirling in my head on how to design cards and gift tags inspired by my salvaged parts. Stay tuned to see what I come up with!

Wednesday, June 10, 2009

Get Lost!: At the Zoo

Next time the kids are driving you nuts or you're just antsy to get out of the house, why not make a stop at the nearest zoo? (You can even threaten to leave the kids in the monkey house if they really start to get on your nerves!) Check out the Association of Zoos and Aquariums website to find a zoo near you!

The local zoo also makes for a great "stay-cation" this summer if the travel budget is a little tight. Don't forget to bring along the digital camera to capture some great shots of the exotic animals you're sure to come across. Go ahead and get inspired by the bright colors and bold patterns you see reflected in feathers, fur coats, and hides of the animals you encounter. Find your favorite pattern or color combo and let it inspire your next scrapbook page, homemade card, knitted afghan, or painted piece of furniture. Don't stop there. Let it also inspire your wardrobe and home decor too!

My personal favorite are the jewel-toned colors of the peacock. It's inspired me to work in peacock blue as an accent color in my living room. We already have sage green and dark brown in there. I can't wait to get a house of our own and paint an accent wall in Largo Teal from Benjamin Moore or Bosporus from Sherwin Williams. Throw in a few coordinating photo frames, candlesticks, and toss pillows, and you have a regal, nature-inspired living space.

Sunday, June 7, 2009

Creative Tip: Free Project Ideas from Joann.com

Even the most crafty and creative person needs a few last minute gift or project ideas. One of my favorite sources for a quick brainstorm or project idea is Joann.com. There you can find a great number of free patterns, free tips, and free project ideas in the Projects and More section of their website. This site should be the first stop for anyone planning bridal or baby showers, summer camp crafts, or even holiday parties or gifts.

I've already started bookmarking some of the projects I'd relish in the chance to try out when I find the time!

Go on and find a new project for you to try this month! I dare you!

Wednesday, June 3, 2009

Get Lost!: In a Greenhouse

Wacky Wednesday is once again upon us and I'm celebrating the less-than-warm temperatures of this teaser summer we are having, by inaugurating a new theme for Wednesdays during the month of June. Now, Wednesday's headlines will be "Get Lost!", a series on inexpensive and entertaining destinations for inspiration. What better way to relax, unwind, and recharge those creative juices than to save a little money, support the local economy, and explore some of the hidden wonders of your community!

First stop: the bright and beautiful, independent greenhouse! (Hint: This trip is especially fun for apartment dwellers or black-thumbs who don't have the space or the talent to keep a garden of their own!) Browse to your hearts content among the aisles and aisles of blossoms and blooms in any local, independent greenhouse. The Big Box Stores all have their corporate versions, but those greenhouses really pale in comparison to the variety and the stunning quality of plants at independent greenhouses.
"Where flowers bloom, so does hope." - Lady Bird Johnson

Color: Like a box of 64 Crayola crayons, almost every shade of every color of the proverbial rainbow are represented by the lush foliage and bountiful blooms of the plants and flowers found in any greenhouse. These colors and clashes of colors have forever been inspiration for artists, designers, poets, and writers. Monet had his water lilies. Shakespeare's rose still smells just as sweet. Channel some of this timeless creative mojo and get inspired by the colorful fragrances and fragrant colors you experience!
"The Earth laughs in flowers." - Ralph Waldo Emerson
The only money you'll have to budget for this little creative excursion is the cost of travel: either a few cents for gas or a few hundred calories if you bike or walk to your local greenhouse. If you are ever interested in purchasing any of the inspiring botanicals you come across, be sure to go native! Look for plants that are native to Wisconsin. Using locally grown, native plants is not only an educational experience, it also benefits the environment and saves you money with no need for pesticides or harsh fertilizers! Check out the DNR website for everything you need to go native!
Check back next Wednesday for another reason to Get Lost!

Saturday, April 18, 2009

Inspiration: Thrift Stores

With the world faced with economic recession and unemployment rates on the rise (with even your favorite blogger searching for one of those non-existent jobs!), any opportunity to save a penny or two is welcomed with open arms. That's why I'm advocating to all of you to run (don't walk!) to your nearest community thrift store! Not only can you find some amazing bargains, incredible one-of-a-kind items, and hilarious nostalgia from yesteryear, you'll also be helping a worthy cause and the positive missions of non-profit organizations with your purchases! It's also one of the greenest ways to shop since you're reducing the production of new products, reusing new-to-you items, and recycling usable materials with the donations of your gently used items. Remember: one person's trash is another person's treasure!

Just check out some of these great thrift store finds I've recently run across:

1) I'm sure you recognize that big guy in back from a previous post about Inspiration. He's my Owl Coin Bank. And he's now watching over the small flock of owls I've found at some local thrift stores! Each one is distinct and special in their own right. And not a single one of them cost me more than $0.99 a piece! These will some day look great scattered among books on built-in shelves in a living room or personal library. (A girl can dream, can't she?)


2) This perfect set of brand new dishes was purchased for only $10 from Goodwill. Stores like Target and Kohl's often donate unsold seasonal or returned merchandise which are then sold at incredibly reduced prices. These will look great in a future dining room or on display in a modern kitchen.

3) This smattering of matching frames was all purchased for under $12.00 at a Goodwill. Sizes range from Wallet to 8x10 and prices ranged from $0.49 to $1.99 a piece. Sometimes it really pays to scour thrift stores for these one-in-a-million opportunities. I especially love the rich teal stain of the wood. It will make a great accent color in our living room. The frames can be used for photos or remnants of decorative fabric or even swatches of coordinating scrapbook paper or wallpaper. Endless possibilities!


4) One valuable lesson thrift store shopping has taught me, is that nothing is strictly as it appears and all things have untapped potential. When it was sitting on the shelf, this homemade welded wonder took a second glance to realize what a find this was! Picture this: an intimate dinner party with a few of your close friends, laughing over plates of Chianti-marinaded pot roast, and sharing stories by candlelight - candlelight that is being provided by this funky chandelier. Those six rings could contain glass-blown votive holders and be hung from the ceiling with a coordinating steel chain or placed on the table as a casual centerpiece. We've also considered using this in the kitchen as a pot rack hung from the ceiling. There's nothing like repurposing thrift store bargains!


And 5) This unusual find really caught the eye of my boyfriend, and no wonder! It's a candle wall sconce that uses a large magnifying glass to magnify the illumination of the single candle's small flame. How unique! This solid brass piece is one of two that I purchased as part of an early birthday gift for Jason. Once we find a proper home for them, we might silver leaf them to match our tastes and decor better. We love the eclectic-ness of them and are looking forward to using them in the near future!

Hope you found these thrift store discoveries just as inspiring as I have! Now run out to your nearest thrift store, Goodwill, or Salvation Army and happy bargain hunting!

Saturday, March 28, 2009

Inspiration: Owls

Here's a new feature I'll be blogging every so often. Inspiration. I'm inspired by the people I meet, the places I travel, the things I see. Each Inspiration Montage will feature a new theme, be it nature, music, belly buttons... This first Inspiration Montage just happens to be about a little something you've all seen featured on this site before: Owls!

1. Our Doormat: We picked this up from Target last summer on clearance. It definitely adds personality to our front door! I wonder what our neighbors think of us...

2. Plate: This decorative plate was a christmas present from my boyfriend's parents. It will work great in a future dining room as wall art when its not being used as a cheese platter!

3. Owl Key Covers: These are a hoot! Get it? A hoot? I picked these babies up at Urban Outfitters in Chicago on a recent trip. If only I had enough keys to use them all!

4. Coin Bank: Target was just a mine-field of owls last season. This gorgeous pewter bank was ordered online from Target's website. It's only about a foot tall, but it was shipped in a 3 ft. x 4 ft. box. What a waste of space!

5. Jewelry: I wear these necklaces when I'm hoping for good luck! The wooden disk on the left is made by an artist in Madison who sells her creations at the Farmers' Market and on Etsy. Check her out! They make great gifts. The pewter charm on the right I purchased in Germany at the Pergamon Museum in Berlin. It's one of my favorite places on earth.

6. Stamps: Hero Arts made these adorable stamps. Definitely expect a few card designs to include these cuties!