Showing posts with label Habitat ReStore. Show all posts

Saturday, July 30, 2011

Feathering Our Nest With Love: Part 4 Wax On!

My patient waiting for the mailman paid off! Check out that incredible finish on our dresser! Late last week I ordered a tin of Briwax Wood Wax from their North American Mid-west Distributor. This English product, endorsed by Her Royal Majesty the Queen of England herself, is made from a blend of real beeswax and carnauba wax. According to the product’s North American website, “Briwax is designed to protect raw wood and can be applied to virtually any existing finish. Use Briwax on all woods, untreated leather, marble, concrete, metal and painted surfaces.” After priming and applying two coats of Pittsburgh Paint Ultra in Aqua Bay, I used fine grit sandpaper to distress the drawers, concentrating on corners and edges that routinely receive typical wear ‘n’ tear.

I then applied a thin coat of Original Briwax in Dark Brown to the dresser drawer, using a soft cloth. You can see the difference between a Briwax-treated drawer and an untreated drawer in the first image. (Click on the image for a larger view) Notice the aged look this gives the drawer and the weathered appearance it invokes. Difficult to believe years and years of weathering and discoloring could happen in less than 5 minutes!

After waxing all four drawers, I added “new” hardware. Both the knobs and drawer pulls were purchased at various Habitat for Humanity Restores throughout the state. The knobs were sold 8 for $1.75 (that’s $0.22 each!) and the drawer pulls were $0.50 each and still in their original packaging! Awesome deals! Awesome way to reduce and reuse and support an amazing cause!

The victim of an over-active imagination, I wanted to add a special touch to the top of our dressers that would retain the casual look of the dressers but update them with a hint of elegance. A broad border in Aqua Bay on the Bamboo painted top of the dresser was the perfect touch! (The above photo was taken before the top was sanded and wax.) This broad border was made using a ruler, a pencil, masking tape, and a fine painter’s brush. The masking tape provided a straight yet feathered edge to my border, perfect for that imperfect hand-painted look.

After sanding and waxing the body of the dresser and installing it in Jay’s closet in our bedroom, the impressive results speak for themselves.


Jay and I were both so impressed at my handiwork that we can’t wait to paint our second dresser and finish our headboard using the same techniques! It will be the first time either of us will have matching bedroom furniture! The days of hand-me-down furniture aren’t gone, they’re just Bri-waxed to a perfect polish! Yay!

Thursday, July 28, 2011

Feathering Our Nest with Love: Part 3 a.k.a. Playin' with Power!

As you can see from the above snapshots, we’ve started work on the much anticipated headboard! We picked up as many of our supplies from Habitat for Humanity Restore as possible. That awesome paneled door was a mere 25 cents! Jay gladly used his new toys to cut the door to a size we need (roughly 60 inches for a queen size bed). The door is a standard 36” wide door. We’re using two 4x4’s (5 feet in length) as the legs for our headboard. We splurged a little bit on the shelf portion of our headboard, spending $50 at the Restore. It’s a quality, unfinished piece that would have easily retailed at $175+ if we had purchased it anywhere else.

We’re keeping with the color scheme established by the dressers we’re refinishing. Pittsburgh Paints has a stunning collection of colors that inspired us. The two colors we’ve chosen to complement each other in our new bedroom are Aqua Bay, a greenish-teal inspired by the sea, and Bamboo, a delicate cream with a splash of honeyed green tea color. Both colors appear in their “Serene” Ultimate Style Collection available at Menard’s. In contrast to our dressers, Bamboo will be the primary color of this piece, with the striking Aqua Bay serving as an unexpected pop of color in very calculated places. But first the ever laborious task of priming!

Sunday, July 24, 2011

Feathering Our Nest With Love: Part One

Now that my devoted husband and I are settling into married life (2 months & counting!), we thought we'd say ta-ta to our bachelor decor ways. Gone are the days of mismatched furniture, disorganized disarray, feuding color palettes, and living out of the clean clothes baskets. Since our lovely Governor is doing his utmost to foil our plans of moving Northwards, we've decided to plow forward and do whatever we can to make our current (yet temporary) living space truly feel like home to us.

First and foremost for any newly-wedded couple: the bedroom. In a one-bedroom apartment, this space needs to be versatile and well-organized but also serene and tranquil.
We have approximately 13' x 13' to work with. This includes a closet with floor to ceiling sliding doors running along the entire eastern wall. We have an awkward 4' window in the middle of the northern wall, directly above our apartment's sole air conditioning unit. Like most apartments, our walls are painted a hazy off-white. Most of the trim and woodwork, including the monstrous closet doors, are a dark espresso veneer. Visually, here is what we have to work with:

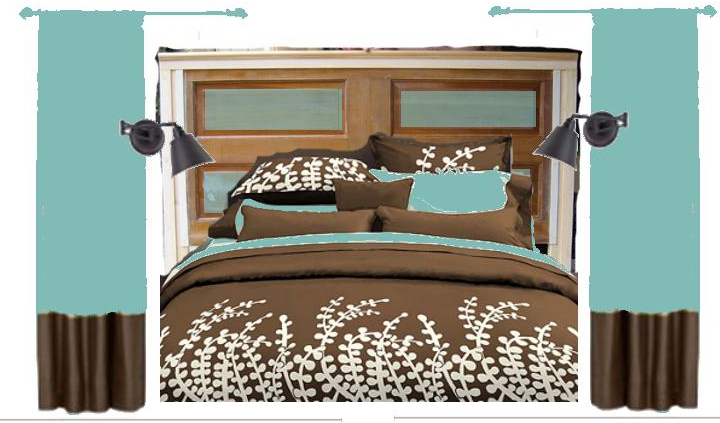
To update our pathetic and paltry bedroom, Jay and I have started scouring the internet, sorting through our fine collection of DIY books, and keeping our eyes open for inspiration. We'd like to re-use and re-purpose whatever we can and supplement what we do have with goodies from Habitat ReStore and thrift stores whenever possible. Visually, here are our initial ideas:


T
hanks to potterybarn.com and Gimp, we've been able to cobble together an inspiration board of sorts. Pottery Barn has an awesome online tool to help you visually map out your room design. We've created the above layout, switching our queen bed from the western wall to the sourthern wall, and adding in some luxury with a unique floor rug. In Gimp, we were able to play around with color and shape to design a working idea. Here's a list of some of the projects/items/ideas we'd like to pursue:
  • Create a headboard out of re-purposed vintage door
  • Find His & Her gooseneck or adjustable wall-mounted reading lamps for bedside
  • Re-configure closets for more efficient use of storage space
  • Re-finish the old dressers Jay has had since he was a kid
  • Enhance the window to allow for natural light yet still provide privacy
  • Disguise the Goliath-size closet doors
  • Provide me with an intimate and inviting workspace
  • Create a serene, tranquil, and stress-free sleeping environment that uses a canopy of sorts to block out the rest of the room for when we just want to "get away from it all"
My plan is to keep y'all posted with daily updates on our progress. Some of these projects are simple Crafty-Quick-Fixes, while other projects may require several days to reach completion. This adventure Jay and I are about to embark upon will be great practice for when we move to a more permanent and North-Eastern-ly location. Blogging about our triumphs and especially our tribulations will help regulate my perfectionism too!

I'm itchin' to get started! Stayed tuned for many updates to come!